By myhandsanitizershop March 25, 2026
A well-planned sanitizer station at home can make daily hygiene feel simple instead of scattered. Rather than hunting for a bottle in a drawer, grabbing tissues from another room, and realizing the trash bin is nowhere nearby, you create one easy-to-use spot that supports clean habits without adding stress.
That is what makes a home setup so useful. It helps family members, visitors, and even busy kids know exactly where to clean their hands when they come in, before they eat, after handling deliveries, or whenever quick cleanup makes sense.
A good station is not just about placing a bottle on a table. It is about making hand hygiene convenient, visible, tidy, and easy to maintain.
The best part is that you do not need a large budget or a lot of space to make one work. Whether you want a simple entry table with sanitizer and wipes or a more polished family sanitizer station with refills, tissues, and storage baskets, there are many ways to build a setup that fits your home and routines.
With the right placement, supplies, and organization, your sanitizer station at home can be both useful and attractive.
What a Sanitizer Station at Home Really Is
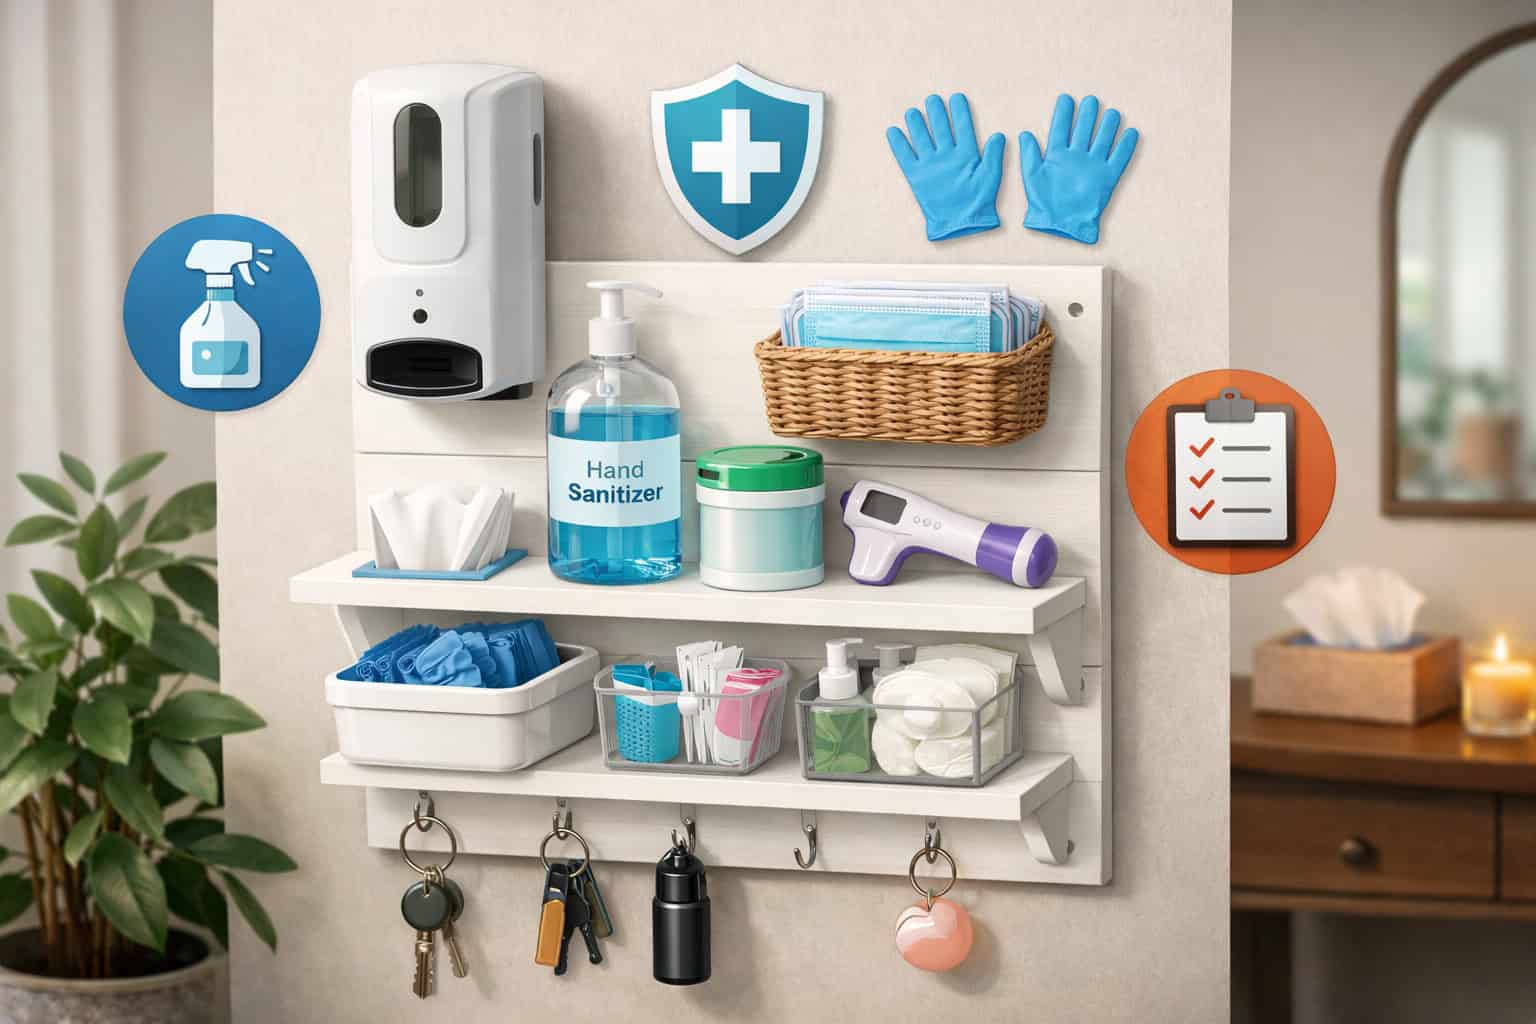
A sanitizer station at home is a dedicated spot where hand-cleaning essentials are kept together in one place for quick and consistent use. In most homes, this includes hand sanitizer as the main item, but a practical setup often goes further. It may also include disinfecting wipes, tissues, a small trash bin, reminder notes, and storage for extra supplies.
Think of it as a mini hygiene hub rather than a random bottle left on a counter. The purpose is to make clean hands easier for everyone in the house. When items are grouped together and easy to reach, people are more likely to use them without being reminded.
This is why many people choose to set up a sanitizer station at home near the front door, in the kitchen, near a mudroom bench, or in a guest area. The station becomes part of the flow of the home. Instead of interrupting a routine, it supports one.
A home hand sanitizer station setup can be very simple or more detailed depending on your space and needs. In a small apartment, it may be a tray on a narrow console. In a larger family home, it might be a full entryway sanitizer station with baskets for refills, wipes, tissues, and separate items for adults and children.
The most effective stations have three qualities:
- They are easy to notice
- They are easy to use
- They are easy to restock
When those three things come together, the station stops feeling like clutter and starts feeling like a smart household system.
Why it is more than just a bottle on a shelf
A single bottle on a side table may technically offer sanitizer, but it usually does not create a dependable routine. Bottles move around, run empty, get buried behind keys or mail, or simply blend into the background. A true hand hygiene station for home use solves those problems by giving hygiene items a defined place and purpose.
A proper station creates visual cues. When people enter through the door and see sanitizer, tissues, and a neat setup waiting for them, the action becomes more natural.
It also reduces the chance of mess because tissues, wipes, and a trash option are already nearby. Instead of sticky drips ending up on furniture or used wipes landing on countertops, the station keeps everything contained.
This also helps with guests. A tidy station near an entrance sends a quiet, practical message that hand-cleaning is easy and welcome. No one has to ask where the sanitizer is. That small convenience can make your space feel more thoughtful and organized.
How a home sanitizer station fits into everyday routines
The most useful home systems are the ones that work with real life. A sanitizer station at home supports many small moments during the day. Family members may use it after coming inside, before handling groceries, after opening deliveries, before snacks, or after touching shared items like remotes, pet supplies, or door handles.
A family sanitizer station is especially helpful in busy households where people are moving in and out often. Children coming home from school activities, parents bringing in bags, guests arriving for dinner, or someone heading into the kitchen after gardening all benefit from having one easy stop.
When the station is set up well, it becomes a habit anchor. Over time, people begin to use it automatically because the setup is clear and consistent. That is what makes it so effective. It does not depend on memory alone. It depends on smart placement and easy access.
Why a Home Sanitizer Station Can Be So Useful
A sanitizer station at home adds convenience, but its real value goes beyond convenience alone. It helps reduce friction in daily routines. When hygiene items are organized in one reliable place, people are less likely to skip them simply because they are in a hurry or unsure where things are.
For families, this can make everyday life smoother. Children often respond better to routines that are visible and simple. Guests appreciate not having to search for supplies. Adults benefit from not having multiple half-used bottles scattered around the house. A station turns random hygiene supplies into a system that supports order.
There is also a strong practical reason for keeping sanitizer and related items together. Homes are full of transition points.
Coming in from outside, handling packages, cooking, caring for pets, helping kids with backpacks, and tidying shared surfaces all create moments where quick hand cleaning makes sense. A home hand sanitizer station setup keeps those moments easy to manage.
A station can also cut down on clutter. Instead of wipes in one drawer, tissues in another room, and sanitizer on a different counter, everything is grouped in one controlled space. That makes the home feel calmer and more intentional.
For many households, a sanitizer organizer idea starts as a functional need and then becomes a general household improvement. The setup helps with hygiene, but it also encourages tidiness, better restocking habits, and less last-minute scrambling when supplies run low.
The benefit of having one consistent place for hygiene supplies
When supplies live in different places, they are easy to forget. One person may leave a bottle in a bedroom, another may take wipes to the car, and someone else may place tissues in a kitchen drawer. Over time, the household ends up with supplies everywhere and nowhere at once.
A consistent station fixes that problem. It gives everyone a shared reference point. If someone needs sanitizer, they know exactly where to go. If refills are running low, it is easier to notice. If guests arrive, they can use the station without asking questions.
That consistency also helps maintain better habits. People are more likely to sanitize when the item is visible and part of the pathway they already use. This is especially helpful in entryways, kitchens, and other transition zones where routines naturally happen.
Why sanitizer stations are helpful even in smaller homes
Some people assume a sanitizer station only works in large houses with wide entryways or extra furniture. In reality, a DIY sanitizer station idea can work in almost any space. A wall shelf, small tray, tiered cart, narrow bench corner, or basket on a counter can all serve the same purpose.
In a compact home, the station may actually be even more valuable because clutter builds quickly when items have no dedicated place. A small but organized setup keeps essentials contained and easy to find. It can also prevent surfaces from becoming overcrowded with random bottles and paper products.
Small homes benefit most from vertical thinking. A wall hook for masks or keys, a small shelf for sanitizer, and a slim trash bin underneath can create a complete hygiene station without taking up much floor space. The goal is not size. The goal is efficiency.
Best Places to Set Up a Sanitizer Station at Home
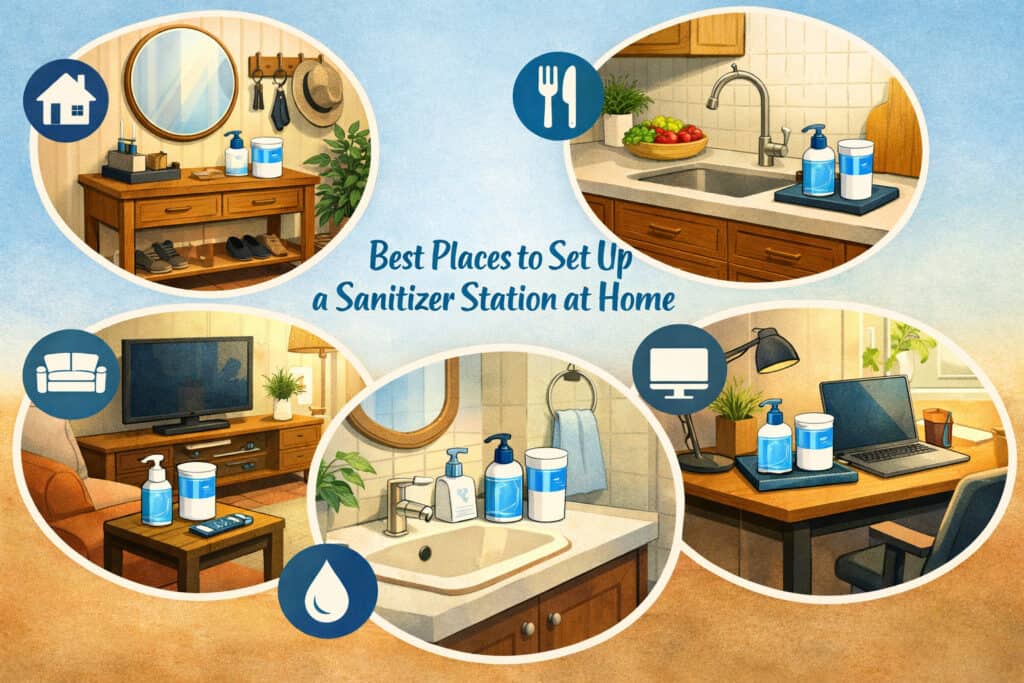
The best location for a sanitizer station at home depends on how your household moves through the space. A station works best where people naturally pause, enter, or transition from one activity to another. That is why entrances, mudrooms, kitchens, and guest zones are some of the most useful choices.
When deciding where to place your setup, focus on real behavior rather than ideal behavior. If nobody uses the formal front door, a station there may look nice but go untouched. If everyone comes through the garage, side door, or back hall, that is where the station belongs.
Visibility matters just as much as convenience. A bottle hidden behind décor or placed on a high shelf is less likely to be used. The station should be easy to see and easy to reach without blocking walkways or crowding important surfaces. It should feel natural, not forced.
A strong entryway sanitizer station is often the top choice because it catches people as they come in. But that is not the only option. Some households do better with more than one small station, such as one near the main entrance and another near the kitchen or guest bathroom. The key is matching placement to everyday life.
Here is a simple comparison of useful placement options.
| Location | Why It Works | Best For | Things to Include |
| Front entry or foyer | Creates a clean habit right when people arrive | Guests, households using the main door | Sanitizer pump, tissues, small trash bin, wipes |
| Garage entry or mudroom | Catches the busiest daily traffic point | Families, school bags, shoes, deliveries | Sanitizer, wipes, basket, hooks, refill storage |
| Kitchen edge or pantry area | Useful before snacks, after groceries, during cooking | Busy households, shared food prep zones | Sanitizer, paper towels, wipes, reminder sign |
| Guest area or hallway | Makes hand cleaning easy for visitors | Entertaining, overnight guests | Touch-free pump, tissues, neat tray |
| Laundry room or utility area | Helpful after chores and pet care | Households with pets or outdoor tasks | Sanitizer, wipes, hand cream, small bin |
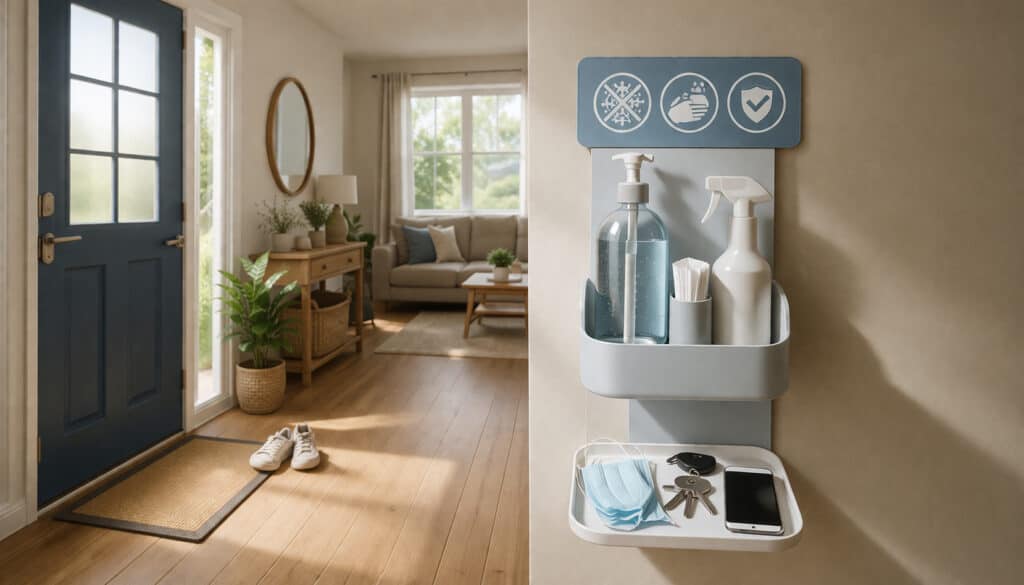
Entryway and front-door setups
An entryway sanitizer station is often the easiest and most effective option. It fits naturally into the arrival routine and gives both family members and visitors an obvious place to clean their hands. If your entry has a console table, bench, narrow shelf, or even just a wall ledge, that may be enough to create a clean and welcoming station.
For this type of setup, keep the items simple and visible. A pump bottle or touchless dispenser, tissues, a small trash container, and a shallow tray for organization usually work well. If there is room, you can add a small basket below for refill bottles and wipes. The goal is to keep the station ready without making the entry feel crowded.
Style matters here because this area is often highly visible. A coordinated tray, neutral containers, and a clean-lined dispenser can help the station blend into your décor instead of looking temporary or clinical.
Kitchen, mudroom, and guest-area options
The kitchen is another strong location, especially in homes where people come in through a side door or gather around food prep areas.
A sanitizer station near the kitchen can support quick hand cleaning before snacks, after handling grocery bags, or after touching shared surfaces. Keep it away from direct heat and cooking splatter, but close enough to be convenient.
Mudrooms are ideal for family homes because they are built around transitions. Shoes come off, bags drop down, and hands are often dirty from outside activities. A family sanitizer station in a mudroom can include not only sanitizer but also wipes, tissues, a child-height pump, and labeled baskets for refills.
Guest areas benefit from smaller, polished setups. A slim tray in a hallway niche, on a side table, or near a guest room can quietly offer hygiene supplies without making the space feel overdone. Guests appreciate easy access, especially when the station looks intentional and tidy.
How to Choose the Right Sanitizer Stand or Surface for Home Use
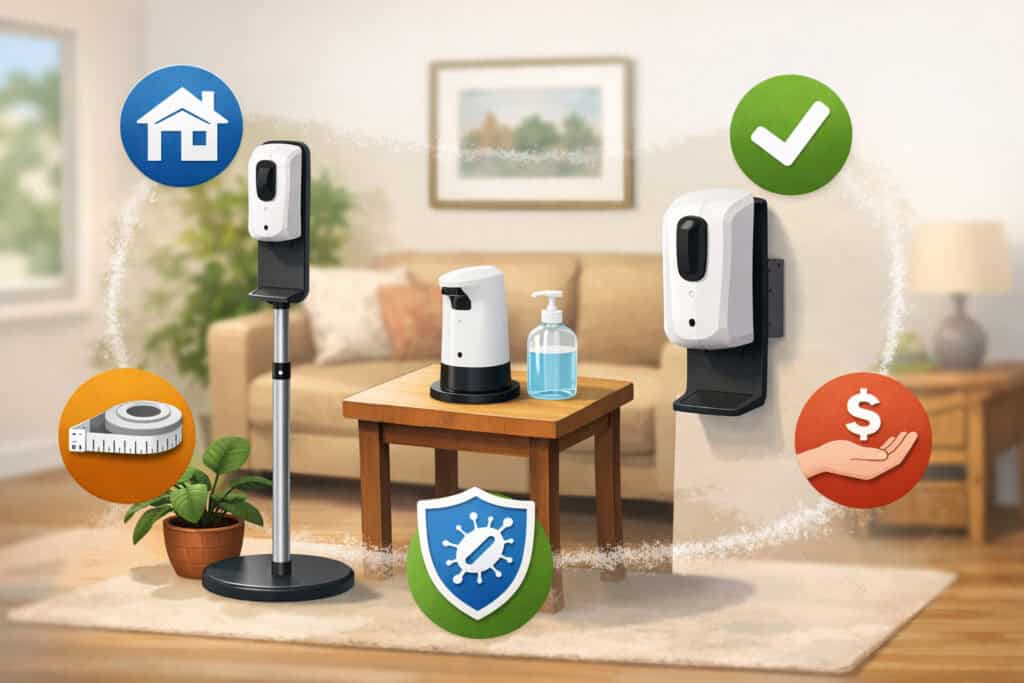
Not every home needs a full sanitizer stand for home use, but every good station needs a stable, sensible surface. The right base depends on the space you have, who will use it, and how much you want the station to hold.
Your setup may be a tray on a console, a wall-mounted shelf, a rolling cart, a corner ladder shelf, or a dedicated stand near the entrance.
Start by thinking about traffic and stability. If the station is used often, the surface needs to handle repeated reaching, pumping, and occasional spills. Wobbly tables, overstuffed shelves, or decorative surfaces that stain easily are not ideal. You want something sturdy, easy to wipe, and sized for the items you actually plan to keep there.
Height matters too. The station should be accessible to the people who use it most. If children are part of the routine, placing sanitizer too high can reduce use or lead to unsafe climbing. If the dispenser is too low, adults may ignore it because it feels awkward.
A good sanitizer stand for home use does not have to be expensive or labeled for hygiene. Many household pieces work well when used thoughtfully. A small bar cart, plant stand, narrow side table, or floating shelf can all serve the same purpose if they provide a safe and organized base.
Freestanding stands, trays, shelves, and carts
Freestanding options work well if you want flexibility. A small side table or slim plant stand can hold a dispenser and tissues while fitting into tight entryways. Rolling carts are useful in homes where the setup may need to shift between spaces or hold more supplies. They also offer lower shelves for refills and extra wipes.
Trays are especially helpful because they define the station visually and catch small drips or clutter. Even if you use an existing table, placing the supplies on a tray makes the setup feel organized instead of random. Choose a tray with enough room for the core items without leaving too much empty space, which can make the station feel unfinished.
Wall shelves are a smart option for small homes. They keep the station off the floor and free up surface space. Just make sure the shelf is installed securely and placed at a practical height.
What to look for in a practical setup surface
The best setup surface has a few simple qualities. It should be sturdy, easy to clean, appropriately sized, and placed in a low-conflict location. That means it should not block door swings, catch on bags, or compete with essential entry tasks like setting down groceries.
Material choice matters more than many people expect. A glossy ceramic tray may look beautiful but can become slippery if the product spills. A woven basket may hold items well but can be harder to clean. A shallow metal or plastic tray is often easier to maintain, especially in high-use households.
If you want the station to blend with your décor, focus on color and form rather than sacrificing function. Neutral containers, matching labels, or a coordinated dispenser can go a long way. The station should look neat, but it should still work first.
What Supplies to Include in a Home Hand Sanitizer Station Setup
A useful home hand sanitizer station setup includes more than just sanitizer. The exact list will vary by household, but the most effective stations combine immediate-use essentials with a few support items that keep the area tidy and functional. The goal is not to crowd the station. It is to include the items people actually need at the moment they use it.
The core supply is, of course, hand sanitizer. This can be a pump bottle, refillable dispenser, or touchless unit depending on your budget and style. Beyond that, many homes benefit from tissues, disinfecting wipes, a small trash bin, and a refill container or backup bottle stored nearby.
If the station is near an entry, you might also include a small dish for rings or keys while hands are cleaned. In a family setup, you may want a separate child-friendly dispenser height or a label that reminds kids to rub hands until dry. In guest areas, a neat tissue holder and visible pump are often enough.
When planning supplies, think in terms of use flow. Someone arrives, sanitizes, wipes if needed, tosses waste, and moves on. Every item should support that flow instead of complicating it.
A well-stocked sanitizer station at home often includes:
- Hand sanitizer dispenser or pump bottle
- Backup refill bottle
- Disinfecting wipes or surface wipes
- Tissues or paper napkins
- Small lined trash bin
- Tray, caddy, or basket for organization
- Optional reminder sign
- Optional hand lotion for frequent use areas
For extra support, you may find it helpful to read CDC guidelines on proper hand sanitizer use and how to choose the best hand sanitizer for everyday use when selecting products for your station.
Essentials every station should have
Every station needs a few basics to work well. First is the sanitizer itself, placed front and center. It should be easy to dispense and easy to notice. Second is some way to manage mess, such as a tissue box, wipes, or paper towels. Third is a disposal option if the area generates trash.
Without these basics, the station can become frustrating. A person may sanitize but have nowhere to place a used wipe. Or they may need a tissue and leave the station to find one elsewhere. Keeping the essentials together is what turns a product into a system.
You may also want to include a non-slip mat or tray liner under bottles to reduce sliding and protect the surface underneath. That small detail can make the station feel more stable and polished.
Helpful extras that improve convenience
Once the core setup is in place, small extras can make the station easier to use and maintain. A basket for refills prevents the last-minute problem of discovering the bottle is empty with no replacement nearby.
A lotion bottle can be useful in high-use areas where hands get dry. A simple note card with a reminder such as “Clean hands on the way in” can help younger children follow the routine without repeated verbal reminders.
For a guest-focused station, you might add a small mirror, a neat tray, or a lined basket with individually wrapped tissues. For a mudroom station, labeled bins for refills, extra wipes, and seasonal items can keep the area orderly.
The best extras are the ones that reduce friction. If an added item does not make the station more useful, it may just be visual clutter.
How to Choose the Right Sanitizer Products for Home Use
Choosing the right product is just as important as choosing the right spot. A sanitizer station at home should make everyday use easier, which means the product needs to be effective, comfortable to use, and suitable for the people in the household.
If the sanitizer feels sticky, has an overpowering scent, or irritates skin, people may stop using it even if the station itself is well organized.
For most households, alcohol-based sanitizer is the standard choice. You can learn more about what to look for when buying hand sanitizer and understanding active ingredients in hand sanitizers to compare formulas, label information, and everyday-use factors. In general, product labels should be checked carefully so you know what is in the bottle and how it is meant to be used.
Format also matters. Some people prefer gel because it feels familiar and easy to control. Others like foam because it spreads quickly. Spray can work well in certain situations but may not be ideal for every station. If you are deciding between formats, comparing gel, foam, and spray hand sanitizers can help clarify the tradeoffs.
A home station should support repeated use, so comfort counts. Look for a formula that dries well, is not overly perfumed unless you want that, and does not leave residue on the hands or surrounding surface. If your household uses sanitizer often, consider pairing the station with hand lotion nearby to reduce dryness.
Gel, foam, spray, and touchless options
Different sanitizer types can change how the station feels to use. Gel is common and easy to find, which makes it a popular choice for a home hand sanitizer station setup. It works well in pump bottles and is easy to see in clear dispensers, which can also help with refill timing.
Foam is often appreciated because it spreads fast and can feel lighter on the skin. For families with children, foam can sometimes be easier to control with smaller hands. Spray is convenient in some portable situations, but on a home station surface it may overspray if users are rushed or careless.
Touchless dispensers can be useful when multiple people use the same station or when you want a cleaner, more modern look. They also reduce direct contact with pump surfaces. If that interests you, learning about touchless hand sanitizer dispensers and wall-mounted vs. portable dispensers can help you decide what fits your space.
What matters most when buying for daily home use
For daily home use, simplicity is usually best. Look for a product that is easy to dispense, easy to refill or replace, and comfortable enough that everyone will actually use it. If you are choosing a family sanitizer station, the dispenser should also be stable and not prone to tipping.
Packaging matters too. Small flip-top bottles are portable, but they are not always ideal for a shared station because they take more effort and can appear cluttered. Larger pump bottles or refillable countertop units tend to work better for a central setup.
It is also smart to think ahead about restocking. If the product is hard to find later or only available in a specialty size, maintaining the station may become harder than it needs to be. Choose something practical enough to keep the system going.
DIY Sanitizer Station Ideas for Small Spaces, Family Homes, and Guest Areas
One of the best things about a sanitizer station at home is how flexible it can be. You do not need a special kit or a big entry hall to make one work. Some of the best DIY sanitizer station ideas are built from items people already have, such as trays, baskets, side tables, wall shelves, caddies, jars, and rolling carts.
The right DIY approach depends on the space and the people using it. A small apartment may need a wall-mounted solution that takes up almost no room. A family home may need a sturdier station with storage for refills and wipes.
A guest area may call for something smaller and more polished. No matter the layout, the goal stays the same: make the setup easy to use, easy to clean, and easy to maintain.
DIY also gives you control over style. You can choose containers and surfaces that match your home instead of settling for something that looks too clinical. A wooden tray, neutral ceramic pump, or labeled basket can make the station feel like part of the room rather than an afterthought.
You also have freedom to build in layers. Start with the basics, then add based on real use. If tissues keep going missing, add a holder. If the bottle runs empty too fast, store refills underneath. If kids are not using the station, add a lower shelf or visual reminder.
DIY ideas for small spaces and apartments
Small spaces call for compact, vertical, or multi-use solutions. A floating shelf near the entry door can hold sanitizer, a slim tissue box, and a small catchall tray.
A wall-mounted basket can hold refill pouches or wipes underneath. If there is no entry table, a narrow over-the-radiator shelf or a command-hook hanging caddy can become a tidy station without using floor space.
Another great option is a tray on top of an existing shoe cabinet, console ledge, or microwave cart near the entrance. Keeping the station defined within a tray helps contain clutter and gives it a clear purpose. Even a compact corner of a counter can become an effective home hand sanitizer station setup if it is arranged thoughtfully.
A tiered cart works especially well in very small homes because it adds storage without needing deep furniture. The top shelf can hold the active supplies, while the lower shelves keep wipes, tissues, and refills out of sight but within reach.
DIY ideas for family homes, kitchens, and guest zones
In family homes, a station often needs to do more. A mudroom bench with a tray on top and labeled baskets underneath can create a complete family sanitizer station. One basket can hold backup sanitizer, another can store wipes and tissues, and a third can be used for small seasonal add-ons such as hand cream or travel-size bottles.
In kitchens, use a tray near the pantry, side door, or far end of the counter so the station does not interfere with food prep. Choose containers that wipe clean easily. A paper towel holder or small tissue cube nearby can make the area more functional without making it feel crowded.
For guest zones, think simple and welcoming. A slim side table with a pump bottle, tissues, and a discreet bin can be enough. You can also repurpose a decorative tray or a lidded box to hold extra items neatly. The station should feel helpful, not overwhelming.
How to Make the Station Convenient, Neat, and Easy to Maintain
A sanitizer station at home only works if people want to use it and you can keep it in good shape without much effort. That is why convenience and maintenance should be built into the design from the start. A station that looks nice for one day but becomes messy by the end of the week will not support lasting habits.
The easiest way to keep the station useful is to reduce friction. Put the most important item at the front, keep related items close by, and avoid overcrowding the surface. If the area is too full, people may move things around, ignore the setup, or leave used items behind. A little open space is just as important as the supplies themselves.
Maintenance becomes easier when every item has a clear place. A tray holds the daily-use products. A basket underneath or nearby stores extras. A small trash bin catches tissues and wipes before they migrate across the room. These simple layers help the station stay neat with less effort.
Regular reset habits matter too. Wipe the surface, check supply levels, empty the bin, and replace anything that looks messy or out of place. This does not need to be time-consuming. In most homes, a quick check a few times a week is enough to keep the station looking clean and ready.
Organizing refills, wipes, tissues, and waste
A clutter-free station usually depends on what happens behind the scenes. Daily-use items should be visible, but backups should be close enough that refilling takes seconds, not another trip through the house. A small drawer, basket, bin, or shelf under the station can hold extra sanitizer, wipes, tissues, and trash liners.
Use simple categories. For example:
- One basket for refill bottles
- One bin for paper goods
- One small pouch or container for labels, clips, or reminder cards
If you keep everything mixed together, restocking becomes annoying, and clutter returns quickly. Labeled storage can be especially useful in family homes where multiple people help with household tasks.
A lined trash bin is worth adding if your station regularly generates waste. Even a small one makes a difference. Without it, used tissues often end up on nearby counters or surfaces.
Creating a station that stays tidy with little effort
To keep the area neat long term, choose products and containers that are easy to clean. Smooth surfaces, washable trays, and refillable dispensers with stable bases tend to stay looking better. Avoid containers that collect dust easily or absorb spills.
A neat station also benefits from limits. Do not keep every possible hygiene item out at once. Focus on what is used daily and store the rest nearby. This makes the setup feel cleaner and more intentional.
Visual balance helps too. Group taller items together, keep labels facing forward, and leave a small amount of breathing room between objects. A station that looks orderly is more likely to stay orderly because people can tell when something is out of place.
How to Make the Station Look Clean and Stylish Without Losing Function
A sanitizer station does not have to look temporary or out of place. In fact, the most successful stations often blend into the home so well that they feel like part of the décor. The secret is to treat the station like a small design zone while still protecting its everyday function.
Start with a simple visual base. A tray, mat, or small shelf helps frame the station and makes it feel intentional. Then choose containers that work well together. Matching or coordinated dispensers, tissue holders, and storage baskets create a calmer look than a mix of random packaging and colors.
Color choice matters. Neutral tones, clear containers, matte finishes, natural wood, black metal, white ceramic, or soft woven textures often blend easily into different rooms. If your home is more colorful, you can still coordinate the station with your style by choosing one or two accent tones rather than letting every item compete visually.
The best-looking stations also stay edited. You do not need a large decorative display. A good home sanitizer station setup is simple, functional, and visually calm. One dispenser, one tissue holder, one wipe container, and one small basket can be enough.
Styling choices that still support everyday use
Beautiful stations fail when they make daily use harder. A delicate tray that tips, a heavy lid that slows access, or decorative items that crowd the pump area can reduce function quickly. Styling should make the station clearer and more inviting, not less practical.
The easiest way to strike the balance is to keep decorative elements minimal and useful. A small framed reminder sign, a washable tray, or an attractive basket for refills can add style without getting in the way. Avoid adding candles, loose ornaments, or fragile objects near the most-used items, especially in high-traffic entry zones.
Good styling also supports visibility. The sanitizer should still be the star of the setup. If someone cannot spot it immediately, the design has gone too far.
Matching the station to different rooms in the home
The look of the station can change depending on the room. In an entryway, you may want something polished and welcoming. A narrow tray on a console with a neutral pump bottle and a discreet bin works well. In a mudroom, durability matters more, so sturdy bins, labeled baskets, and wipe-clean materials may be the better choice.
Kitchen stations often benefit from a cleaner, more streamlined look. A compact pump and wipe holder in finishes that match nearby appliances or hardware can help the setup blend in. Guest-area stations usually look best when simplified. Keep only what visitors need and present it neatly.
The more the station matches the room’s rhythm and style, the more natural it will feel to use every day.
Safety Tips for Homes With Children or Pets
A sanitizer station at home should be easy to use, but it should also be safe. This matters especially in homes with young children, curious toddlers, or pets that may knock things over or investigate surfaces. A safe setup protects the household while still keeping hygiene supplies accessible to the people who need them.
The first rule is placement. The station should not be unstable, easy to tip, or positioned where a child or pet can pull down multiple items at once. If you are using a narrow stand, make sure it is stable and does not wobble.
If you are mounting shelves, install them securely. If your household includes very young children, consider what should be within reach and what should be stored slightly higher or in closed storage nearby.
Spills should be taken seriously. Sticky sanitizer residue can attract attention from small children and pets, so bottles should be wiped promptly and surfaces kept clean. Trash bins should also be managed carefully, especially if they contain used wipes or tissues.
Product choice matters too. Read labels, follow instructions, and store refills safely. A family sanitizer station should feel easy, but it should not encourage unsupervised misuse. Balance convenience with common-sense control.
Safer placement and storage choices
In child- and pet-friendly homes, it often helps to separate active-use items from backup storage. The active dispenser can stay accessible, while larger refills, extra wipes, and replacement bottles are stored in a closed bin, upper shelf, or cabinet nearby. This keeps the station practical without making every supply immediately available.
Avoid placing the station on unstable stools, stackable boxes, or narrow decorative stands that can shift under repeated use. Heavy-base dispensers or wall-supported surfaces are often safer. If the station is near a doorway, make sure it does not block movement or create a tripping hazard.
For pet households, consider tail height as well as hand height. Small bins, dangling tissues, or bottles placed near the edge of a low surface can be easy to bump or pull down.
Building good habits around safe use
A safe station is not only about furniture and products. It is also about routine. Show children how much product to use, remind them not to touch their face before hands are dry, and keep the area wiped clean so it stays inviting rather than sticky or chaotic.
It also helps to model use in the same order each time. For example, come in, place down bags, sanitize, toss tissues if needed, and continue into the home. Repeating a simple sequence helps children and guests understand how the station is meant to work.
If your household uses the station frequently, keep an eye on wear and tear. Loose pumps, cracked containers, or buildup on the tray can make the station less safe and less pleasant to use.
Common Mistakes to Avoid When Creating a Sanitizer Station
Many sanitizer station ideas start with good intentions but do not hold up in daily life because of a few common mistakes. The most frequent problem is poor placement. A station tucked into a corner nobody uses may look tidy, but it will not become part of the household routine. Convenience should always come before appearance.
Another common issue is overloading the station. It is tempting to place every hygiene product in one spot, but too many items can make the setup confusing and messy. People need a clear, simple station they can use in a few seconds. If they must sort through multiple bottles, random containers, and decorative objects, the station stops being helpful.
Lack of backup storage is another problem. A station with no nearby refills can become useless the moment the main bottle runs empty. Likewise, failing to include a small waste solution often leads to tissues or wipes ending up elsewhere. These small oversights can make the station look neglected fast.
Some people also choose style over function. Delicate trays, unstable stands, hard-to-open lids, or awkward dispenser heights may look nice initially but often become frustrating. A station should be pleasant to look at, but not at the cost of usability.
Setup mistakes that reduce convenience
A common convenience mistake is placing the sanitizer too far from the actual traffic path. Even a few extra steps can reduce use. Another is putting the station where it competes with everyday clutter such as mail, bags, or electronics. When the station shares space with too many unrelated items, it quickly disappears into the background.
Using the wrong bottle size can also create problems. Tiny bottles require constant replacement, while oversized containers may look bulky or be easy to knock over. Aim for a size that suits your household’s usage and the scale of the space.
Not considering different users can also weaken the setup. If kids cannot reach the dispenser, guests do not recognize the station, or older adults find the pump difficult, the system needs adjustment.
Maintenance mistakes that make the station fail over time
Even a great station can stop working if it is not maintained. Letting the bottle run empty, allowing drips to build up, or ignoring overflowing trash makes the area feel unpleasant. Once that happens, people are less likely to use it consistently.
Another mistake is storing refills too far away. If restocking requires searching closets or moving through multiple rooms, it becomes a chore that is easy to postpone. Keep restocking simple and visible.
Finally, avoid constantly changing the station’s location. Once people get used to one setup, moving it without a clear reason can weaken the habit. Consistency is one of the biggest strengths of a hand hygiene station for home use.
How to Keep the Station Stocked and Ready Every Day on a Budget
A sanitizer station at home does not need to be expensive to work well. In fact, many of the best setups are built from simple household items and maintained with a few repeatable habits. Budget-friendly stations succeed when they prioritize usefulness over extras and rely on practical organization instead of specialty products.
Start with what you already own. A tray, small shelf, side table, or basket may be enough to create the foundation. Instead of buying a dedicated sanitizer stand for home use right away, repurpose something stable and easy to clean. The same goes for storage. Shoe-box-sized bins, clear pantry containers, or labeled baskets you already have can store refills neatly.
To control ongoing costs, think in terms of refill strategy. Larger refill containers may be more practical for busy homes if you are using a refillable dispenser. Wipes, tissues, and liners can also be stocked in simple bulk-friendly quantities as long as they are stored neatly nearby.
A small restocking routine saves money too because it prevents waste. When you can see what you already have, you are less likely to buy duplicates or forget supplies until you need an urgent replacement. A low-cost station can still feel polished if it is kept clean and organized.
Budget-friendly ways to build the station
Some of the easiest low-cost DIY sanitizer station ideas come from repurposed home items. A cutting board can become a tray base. A small plant stand can hold the dispenser. A utensil caddy can organize tissues and wipes. A narrow bookshelf or bedside table can become an entryway sanitizer station with storage underneath.
Clear bins and simple labels can make inexpensive items look intentional. Matching is nice, but consistency matters more than perfection. If all your containers are easy to use, easy to wipe, and visually tidy, the station will feel organized even without premium materials.
You can also save by focusing on one high-use station first. Rather than placing multiple full stations around the home immediately, create one strong central setup and then add smaller support points only if needed.
Easy routines for keeping supplies ready
A station stays ready when refilling is simple and predictable. Check the dispenser level regularly, replace tissues before the box is completely empty, and keep a small count of backup items in the nearby bin. This removes the all-or-nothing feeling that causes many home systems to fail.
A simple weekly check is enough for many homes. Look at sanitizer level, wipe the tray, empty the trash, and confirm that one spare refill is still available. For larger households, you may need to check more often, but the process is still quick if the system is organized.
The goal is not perfection. It is reliability. A station that is usually clean, stocked, and easy to use will do more for your home than a picture-perfect setup that becomes inconvenient after a few days.
Frequently Asked Questions
Conclusion
A sanitizer station at home is one of those small household upgrades that can make a noticeable difference every day. It brings hand-cleaning essentials into one clear, reliable place, helps reduce clutter, supports better routines, and makes the home feel more organized overall.
The best setup is not the biggest or the fanciest one. It is the one that fits your space, matches your household habits, and stays easy to use over time.
Whether you choose a simple tray by the door, a mudroom family sanitizer station, or a polished guest-area setup, the same basics apply: place it where people naturally pause, stock it with the right supplies, keep it neat, and make maintenance simple.
If you want to set up a sanitizer station at home that truly works, start small, think practically, and build around everyday use. A well-placed, well-organized station can turn a scattered habit into an easy part of home life without taking much space, time, or money.